The grid is the first composition habit most photographers learn, and still the one most people use badly. Not because it's complicated. Because tutorials drop it on a stock sunset and never walk through what to do when your friend is mid-sentence at a table, or a cyclist is about to leave the frame.
This is that walkthrough, for photographs that look like your actual life.
What the rule of thirds actually is
Imagine your frame cut by two equally spaced vertical lines and two equally spaced horizontal lines. Nine rectangles. Four points where the lines cross.
That's the whole device. You place the thing you care about on a line, or better, on one of those crossings, instead of parking it in the dead center.
Centering isn't a crime. It's a default. The camera, and a lot of our eyes, love the middle. The rule of thirds interrupts that habit so the picture has direction. Space on one side. Weight on the other. A place for the photograph to go.
Turn on the grid in your iPhone camera if you haven't already. Settings, Camera, Grid. Leave it on for a week. Then try shooting without it and notice whether your feet still move.
How to use the rule of thirds in a real scene
The overlay only helps if you know which line to honor. Here's how that decision looks when you're actually holding a phone.
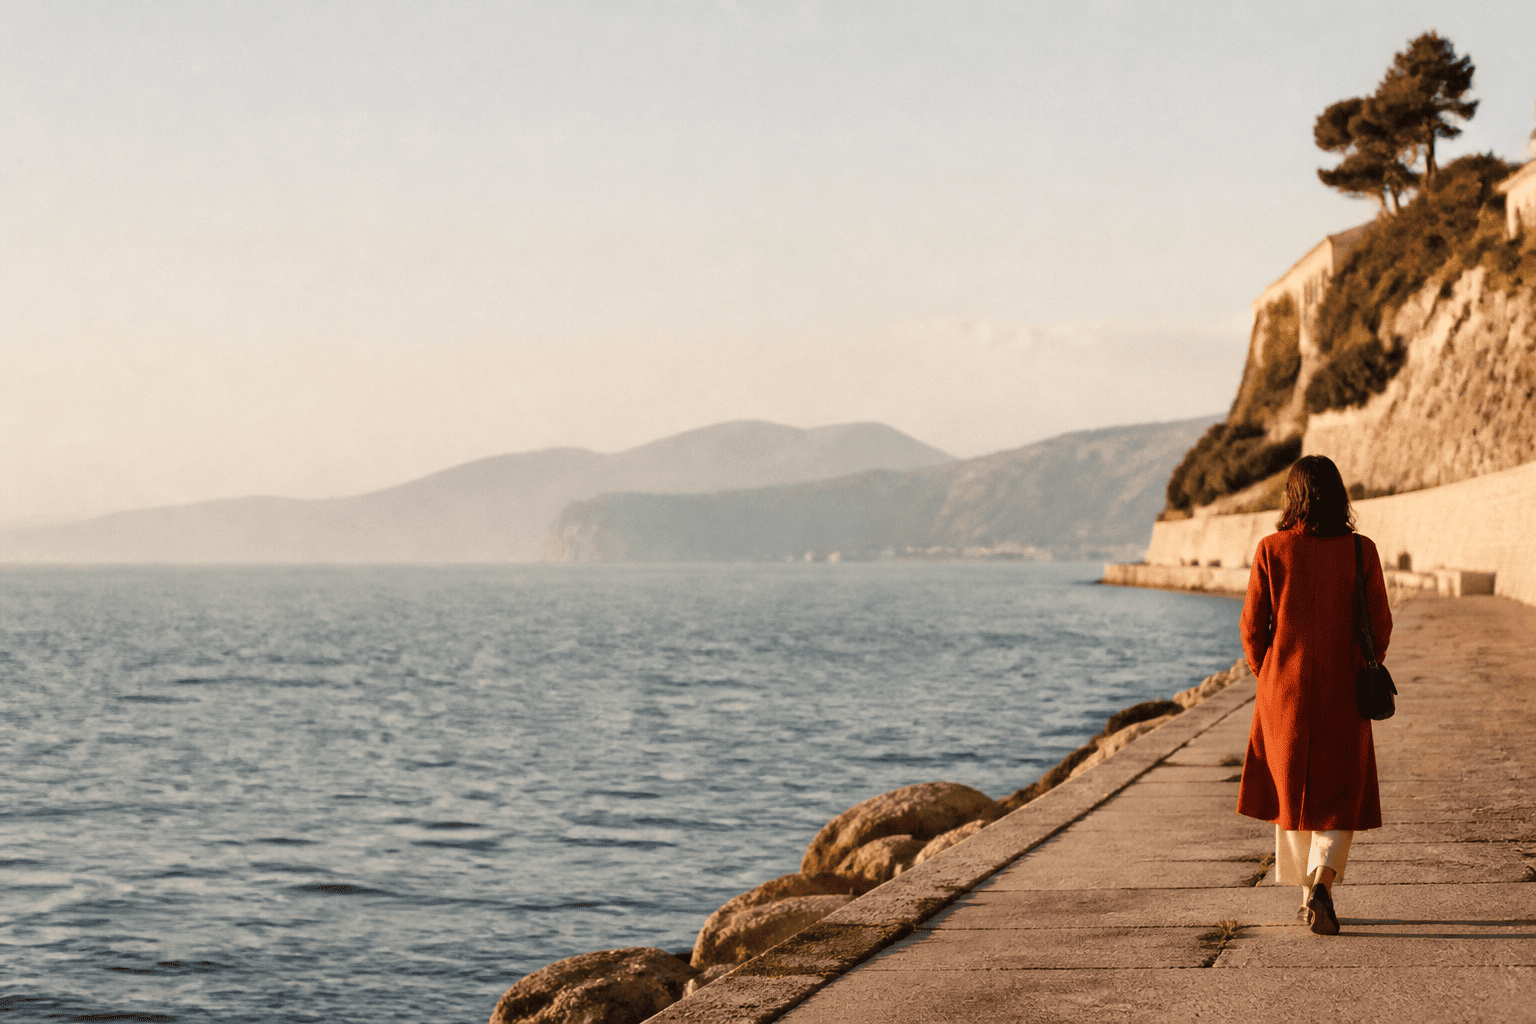
A person walking along a sea wall
Your subject is moving right, coat bright against the water. Put her in the center and the photo feels paused, like a passport portrait that wandered outdoors. Slide her onto the left vertical third. Leave the right two-thirds open: water, sky, the path she's about to take.
That empty stretch is not wasted. It's negative space, the room a photograph needs so the subject isn't suffocating the edges. The eye enters at her, then travels into the space she's walking toward. You can almost hear the next step.
A small physical move usually does it. One step left. A half-step back. You are not cropping later. You are choosing the frame now.
Someone sitting across from you at a cafe
Hands around a cup. Window light from the left. The temptation is to put the face in the middle and call it a portrait.
Try this instead. Put their eyes near the upper-right intersection, where the top horizontal third meets the right vertical third. Let the window, the table edge, the blur of the street occupy the left. Their gaze can fall back into that space, or toward you, depending on the conversation.
If the light is the interesting part of the picture, protect it. Don't let a busy pastry case fill the open third. A quiet backdrop makes the placement feel considered instead of accidental.
You will feel slightly rude shifting in your chair. Do it anyway. Your friend will not notice. The photograph will.

Last light over a field, a rooftop, the sea
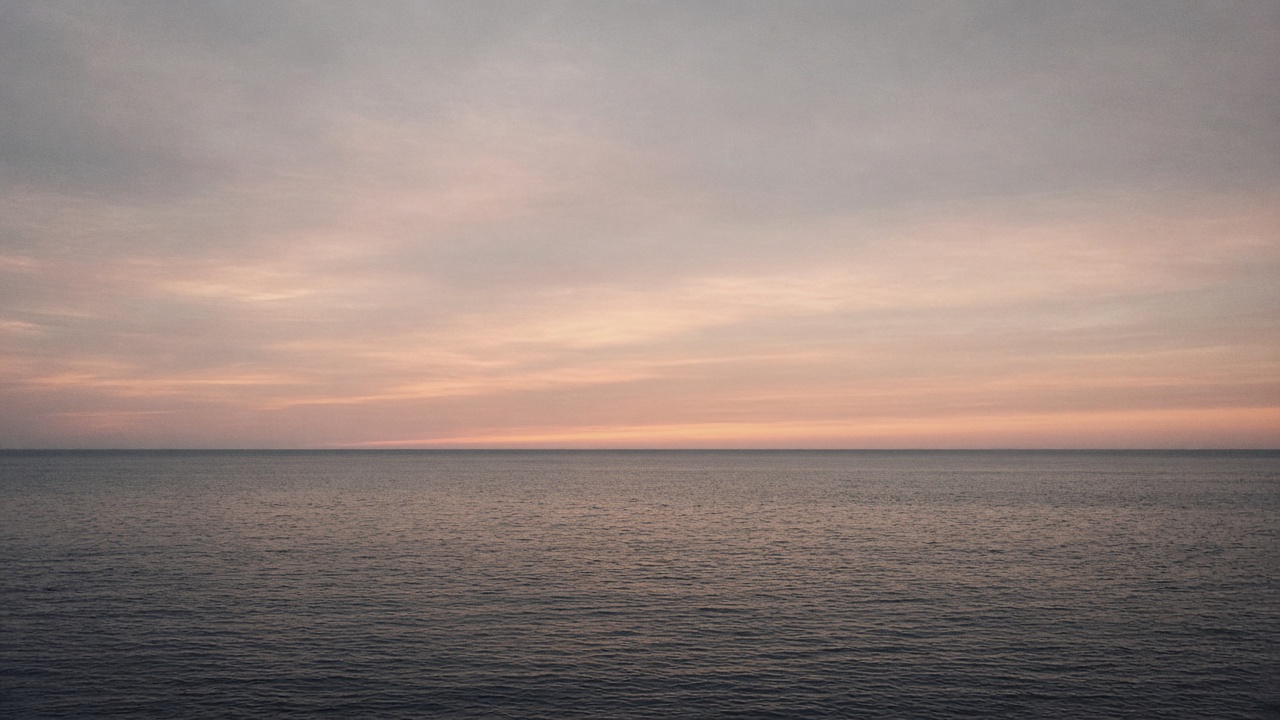
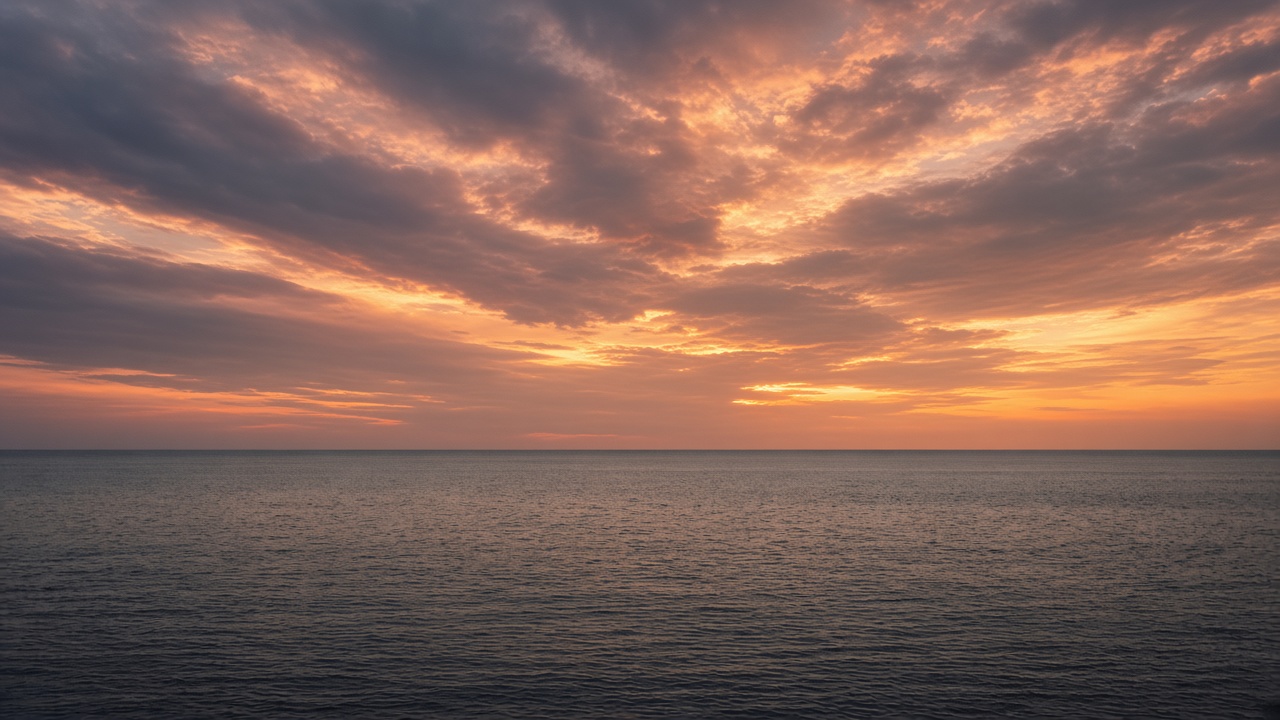
Landscapes are where people treat the rule of thirds like a law about horizons. Lower third or upper third. Never the middle.
That's useful, until it isn't. If the sky is doing something rare, a storm tearing open, a color you will not see again, give the sky the larger share. Horizon on the lower third. If the foreground is the story (wet sand, a stone wall, a bicycle lying in grass), drop the horizon to the upper third and let the ground breathe.
What you are really choosing is which part of the picture earns more real estate. The thirds lines just make that choice visible.
 Centered horizon
Where should the subject sit on the grid?
Not every third is equal in a given picture.
A runner belongs on the third they are leaving, so they move into the open part of the frame. Park them on the right third while they jog left, and they look like they're about to exit the photo. Swap it.
Portraits live in the eyes. Put those on an upper intersection. If the eyes sit too low, you get a lot of forehead and nowhere to land.
A lone object, a lamp, a chair, a single tree, often looks stronger on a vertical third than in the middle. Then check the other side. If that side is clutter, you haven't composed. You've just off-centered a mess.
And keep the horizon honest. A tilted sea on a lower third still looks like a mistake. Leveling the frame is a different skill from placing a subject, but the two travel together. A strong third with a drunken horizon will not save you.
What the four intersection points are for
The lines are useful. The crossings are better.
Those four points (upper left, upper right, lower left, lower right) are where the eye likes to rest. A face at upper right. A red umbrella at lower left. You don't need all four working at once. One is enough. Two can start a conversation across the frame.
A street scene at dusk: scooter headlight at the lower-left intersection, a person waiting under a sign at the upper right. The photograph becomes a relationship, not a catalog of objects.
If you only remember one thing from the grid, remember the crossings. Place the smallest, most important thing there. Then stop fiddling.
When breaking the rule of thirds is the better photo
Some pictures want the middle.
A person standing in a doorway, architecture repeating on both sides. A reflection in a puddle that only works if the world folds exactly in half. A face so close that thirds would crop an ear and a thought. A kid mid-leap, where the gesture is the composition and you had half a second.
The rule of thirds is a way of not defaulting to center. Once you can place a subject on a third without thinking, centering becomes a choice again. That's the point. Not obedience.
I still center things. Symmetry, ritual, a quiet stare into the lens. I just know why I'm doing it.

A simple way to practice this week
Pick one subject you already photograph. Your dog. Your street. The walk home.
Take three frames of the same moment. One centered. One with the subject on the left third. One on the right. Don't look at them until you're home. Then sit with the three and notice which one you'd keep. Not which one followed the rule. Which one feels like a picture.
Do that ten times. You will start moving your feet before you lift the phone. That's the real skill. The grid is training wheels for your stance.
If a frame still feels tight, the subject is probably too large in the rectangle. Step back. Give them room to breathe. If it feels empty in a dull way, you're too far, or the open third is filled with trash cans and a parked van. Change your angle. Crouch. Wait for someone to leave the background.
Composition is mostly editing the world with your body.
Seeing it while you shoot
A lot of us learned this from overlays on photos we'd already taken. Useful, a little late. The photograph is made in the second before the shutter, in the half-step you take to put a person on a line.
We built Framewiser for that second. Not as another manual camera, and not as a lecture after the fact. As a quiet coach in the viewfinder: move slightly left, give them room, that's the frame. Eventually you stop needing the nudge. The thirds become a feeling in your feet.
Until then, keep the grid on. Stand a little to one side. Leave space in the direction life is already going.